BMW X3 Service & Repair Manual: Repairing clips for roof strip
The following instructions describe the permanent repair gluing of clips which were originally secured with T- pins.
The repair gluing at the same time protects the area of the torn-off T-pin permanently against corrosion.
1.0 Information on dangers/hazards:
- Read and comply with the manufacturer's information on dangers/hazards prior to application.
- Avoid eye and skin contact. Wear solvent-resistant protective gloves.
- Do not inhale adhesive fumes. Apply in well ventilated rooms only.
1.0 Equipment
- ADHESIVE K4
- Static mixing tube
- ADHESIVE GUN
- Cleaning agent R1
- Adhesive tape for fixing
2.0 Preparing the surface:
- Surface temperature of bonding surface and room temperature at least 18ºC.
- Cover area around bonding surface.
- Remove swarf, flaked paint etc. from bonding surface with a brush. Use of compressed air prohibited!
- Clean bonding surface with cleaning agent R1.
- Let cleaned surface air dry for at least 2 minutes. Bonding surface must be completely dry.
- Do not contaminate bonding surfaces once they have been cleaned (sweat from hands, fingerprints, etc.).
3.0 Applying the adhesive:
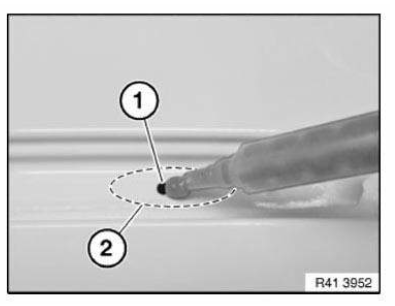
- Fill the hole (1) created by the torn-off T-pin with adhesive and spread over a length of approx. 4 cm (2) in the roof channel.
IMPORTANT: The hole must be completely filled or sealed with adhesive!
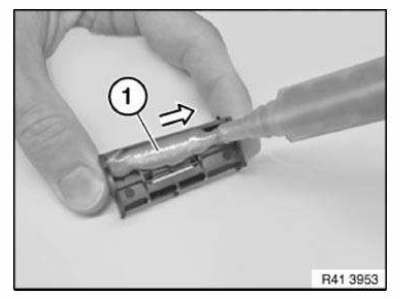
Apply adhesive bead (1) to the underside of the clip.
In so doing, fill channel of clip with adhesive.
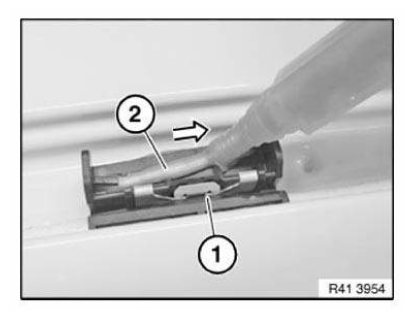
Move clip (1) into position and secure by hand.
If the adhesive is not already emerging evenly through the channel, apply additional adhesive from above.
Adhesive bead (2) must be below the clip height.
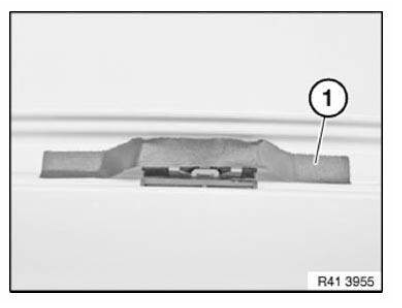
Secure clip with adhesive tape (1), approx. 150 mm long.
Apply adhesive tape in direction of travel.
4.0 Hardening period:
- Adhesive tape can be removed after approx. 10 mins.
- Earliest possible load capability, e.g. fitting of roof strip, after 30 minutes.
 Repair techniques, repair stage 3
Repairs that are carried out by bonding and riveting with the use of a straightening bench or welding.
Repair techniques
Straightening structur ...
 Repairing headlights
It is possible to repair the following damage:
Deformed or broken holders can be replaced using the available repair kits.
Replacement of hea ...
Other materials:
BMW X3 Service & Repair Manual > Control arms and struts: Removing and installing/replacing left or right toe arm
IMPORTANT:
The toe link must be installed with the opening (U-section) facing downward!
If the toe link is bent, the control arm/wheel carrier screw connection must be renewed.
NOTE:
If the toe link is detached from the rear axle support, it will be necessary to
carry out th ...
BMW X3 Owners Manual
BMW X3 Service & Repair Manual
