BMW X3 Service & Repair Manual: Cabin air filter
NOTE: Manufacturer's terminology for this filter is Microfilter.
REMOVAL & INSTALLATION
Replacing microfilter for interior ventilation
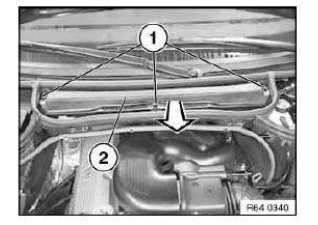
Turn toggle (1) through approx. 90º and remove cover (2) towards front.
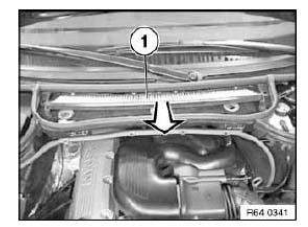
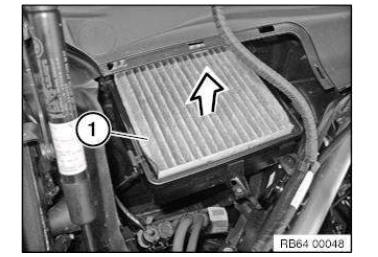
Remove microfilter element (1).
Replacing microfilter for interior ventilation
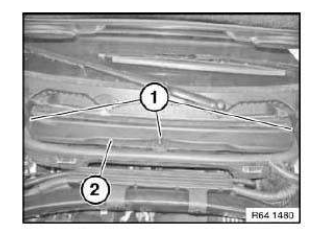
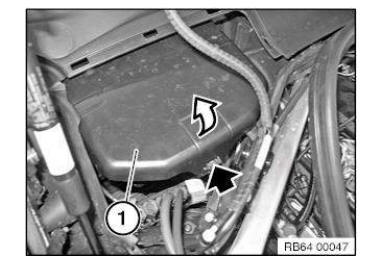
Unlock rotary catches (1), raise cover (2) and remove microfilter.
Replacing microfilter for interior ventilation
IMPORTANT: Risk of damage! A/C system must not be operated without the prescribed filter element.
Note on cleaning: Spray microfilter housing from inside with BMW pollen filter housing cleaner. Wipe away excess liquid. This kills off germs, bacteria and fungi that cause smells. The smell that results on the plastic parts of the microfilter housing is eliminated.
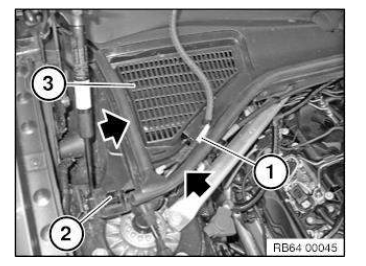
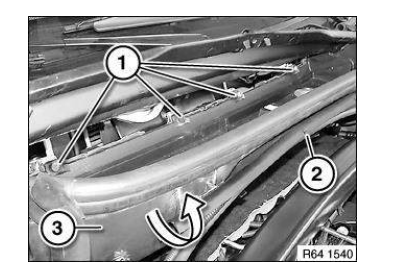
Remove sealing lips at marked points. Unclip line and water hose (1) from cover (3). Release retaining lug (2).
Feed out cover (3).
Cover tabs (1) must snap in correctly under cowl panel.
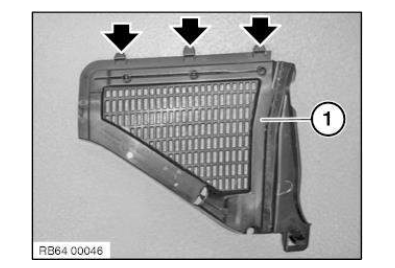
Remove filter cover (1) in direction of arrow.
Remove upper microfilter (1) in direction of arrow.
Unclip filter frame (1) at the marked points and detach. Remove lower microfilter (2) in direction of arrow.
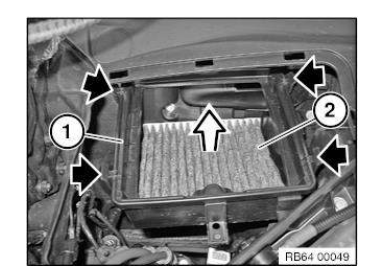
Installation note: Make sure upper microfilter (1) and lower microfilter (2) are installed in the correct position.
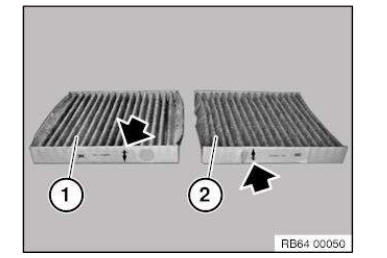
The arrows mark the direction o f the air intake.
Removing and installing/replacing microfilter housing
Necessary preliminary tasks:
- Remove microfilter.
- Remove cable duct cover .
Release screws (1). Remove lines from cable duct (2). Feed microfilter housing (3) upwards in direction of arrow.
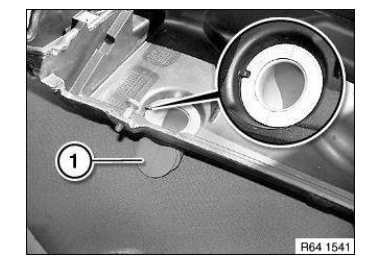
Installation: Make sure water drain hoses (1) are correctly seated.
 HVAC
HVAC
...
 Cabin air filter applications
NOTE:
This article is generic in nature and applies to many different makes and
models. We do our best to determine which vehicles do and do not ha ...
Other materials:
BMW X3 Service & Repair Manual > Oil pressure/oil temperature/oil gauge: Removing and installing/replacing oil level sensor for engine oil
(N47 D20 O1)
IMPORTANT:
Read and comply with notes on PROTECTION AGAINST ELECTROSTATIC
DISCHARGE (ESD PROTECTION) .
Necessary preliminary tasks:
Switch off ignition
Remove front UNDERBODY PROTECTION .
Drain ENGINE OIL .
Unlock connector (1) and remove.
Unscrew nuts.
Remove oil level se ...
BMW X3 Owners Manual
BMW X3 Service & Repair Manual
