BMW X3 Service & Repair Manual: Removing and installing or replacing brake pads on both rear disc brakes (trw floating caliper)
Special tools required:
- 34 1 280
- 2 320 871
- 2 320 299
IMPORTANT:
- Brake pad wear sensor: after removal it must be replaced (brake pad wear sensor loses its retention capability in the break pad).
- Retaining pins and expanding spring: for vehicles older than 48 months it is recommended to replace the retaining spring!
So as not to damage the surface coating, if possible do not mechanically clean the guide surfaces for the brake pads on the brake caliper mounting bracket. Instead, clean with brake cleaner BMW part no. 83 19 2 154 780 and apply a thin coating of brake pad paste BMW part no. 83 19 2 158 851 (3 g) or 83 19 2 158 852 (100 g). Spread brake pad paste onto the marked surfaces using a brush! Observe REGULATION ON APPLYING BRAKE PAD PASTE TO BRAKE PADS AND BRAKE ANCHOR PLATES!
WARNING: During repair work on the rear brake it must be ensured that the push button for the electrical parking brake cannot be activated.
Necessary preliminary tasks:
- REMOVE WHEELS .
- Remove rear brake pad wear sensor.
When the repair work is complete, please pay attention to the following:
- Switch on ignition and, using electrical parking brake operating element, open parking brake once, close once and open again.
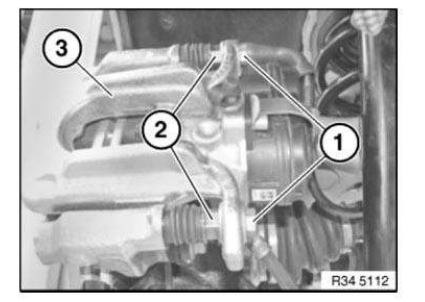
Unscrew guide bolts (1).
If necessary, grip at hexagon head (2).
Remove brake caliper (3).
Installation note: Replace guide bolts.
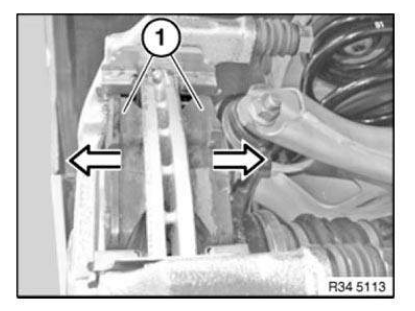
Remove brake pads (1) in direction of arrow from brake anchor plate.
IMPORTANT: Mark any worn brake pads.
In the event of one-sided brake pad wear, do not change brake pads round.
Observe MINIMUM THICKNESS OF BRAKE PADS .
Clean brake pads.
Do not apply grease to brake lining backplate.
Check minimum brake disc thickness:
- Position special tool 34 1 280 at three measuring points in area (1) and measure.
- Compare measuring result and lowest value with SETPOINT VALUE .
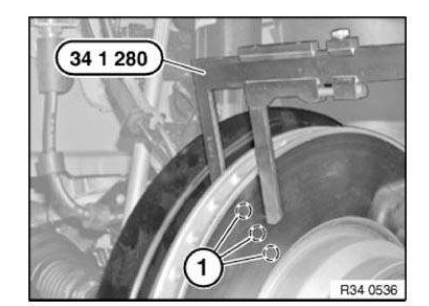
IMPORTANT: New brake pads may only be fitted if the brake disc thickness is greater than the MINIMUM BRAKE DISC THICKNESS (MIN TH).
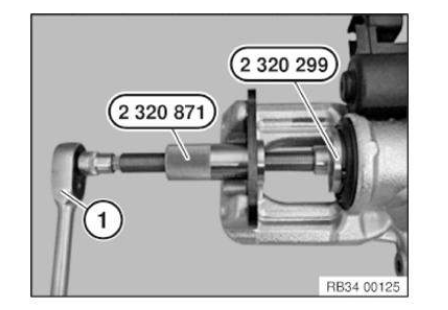
Place special tool 2 320 871 , 2 320 299 on brake piston.
Use reversible ratchet (1) to turn back brake piston up to limit position.
IMPORTANT: When pressing piston back, note brake fluid level in expansion tank.
Overflowing brake fluid will damage the paintwork.
IMPORTANT: Dust boot must not come into contact with brake pad paste as this may cause the dust boot to swell.
Check dust boot for damage and renew if necessary.
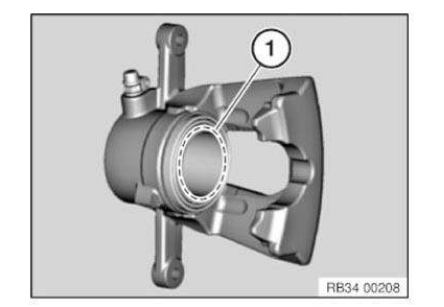
Clean contact surface (1) of brake piston with brake cleaner and apply a thin coating of brake pad paste.
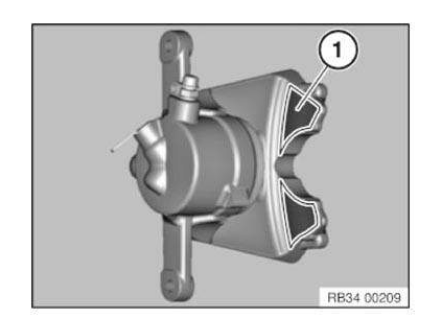
Clean contact surface (1) of brake caliper with brake cleaner and apply a thin coating of brake pad paste.
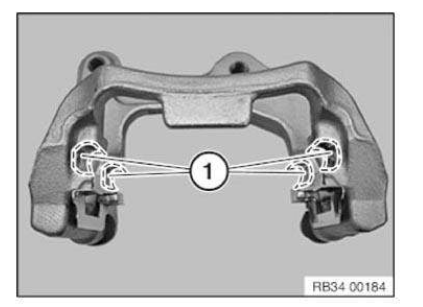
So as not to damage the surface coating, if possible do not mechanically clean the guide surface (1) for the brake pads on the brake caliper mounting bracket. Clean guide surface (1) with brake cleaner and apply a thin coating of brake pad paste.
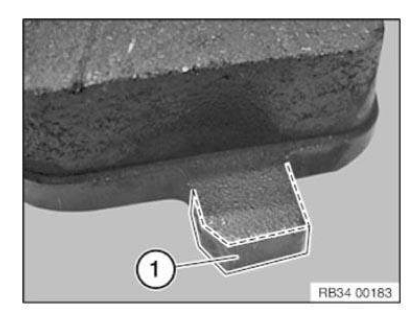
Apply a thin coating of brake pad paste to both sides of T-head of brake pad in area (1).
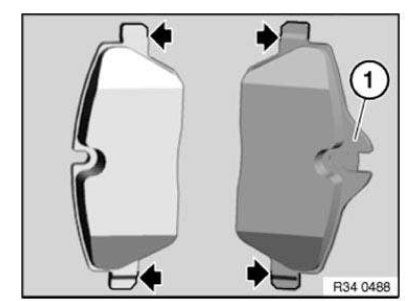
IMPORTANT: Brake pad with bulge (1) is intended for accommodating the brake pad wear sensor and must be fitted on the piston side.
NOTE: After completing repair work:
- Fully depress brake pedal several times so that brake pads contact brake discs.
- When installing new brake pads at front and rear axles, brake fluid level must be brought up to "MAX" mark.
- Read and comply with notes on breaking in new brake discs/brake pads.
- When replacing pads, reset CBS display in accordance with factory specification.
- The installation position of the actuators is automatically overridden by detecting a speed signal.
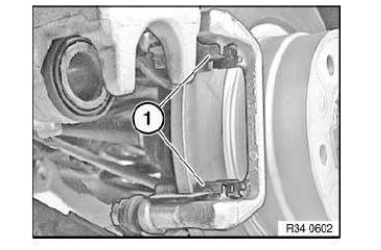
Replacement: Remove lining springs (1) and replace.
Installation note: So as not to damage the surface coating, if possible do not mechanically clean the guide surfaces (1) for the brake pads on the brake caliper mounting bracket. Instead, clean with brake cleaner and apply a thin coating of brake pad paste.
 Removing and installing or replacing both rear brake discs
Special tools required:
34 1 280
Necessary preliminary tasks:
Remove WHEELS .
Remove and clean BRAKE PADS.
After completing repair wor ...
 Removing and installing or replacing rear left or right brake caliper (trw)
Necessary preliminary tasks:
Remove WHEEL .
Read and comply with GENERAL INFORMATION.
Switch off ignition.
After completing repair work: BL ...
Other materials:
BMW X3 Service & Repair Manual > Front trim panel: Removing and installing front panel
Necessary preliminary tasks:
Remove FRONT BUMPER TRIM .
Unlock plug-in connector (1) for horn and disconnect.
Shown on left side, right side identical.
Open clutch (1) and detach Bowden cable for hood/bonnet release.
Release screw (2).
Unlock plug connection (3) for headlight and ...
