BMW X3 (F25) Service & Repair Manual: Roof outer skin
- Replace roof outer skin with slide/tilt sunroof
- Replacing roof outer skin (normal roof)
- Stripping operations - replacing roof outer skin (normal roof)
- Stripping operations - replacing roof outer skin (version with panorama glass roof)
Replace roof outer skin with slide/tilt sunroof
Read contents of BODY, GENERAL.
STRIP DOWN VEHICLE
NOTE: Observe (REPAIR STAGE 2) procedure!
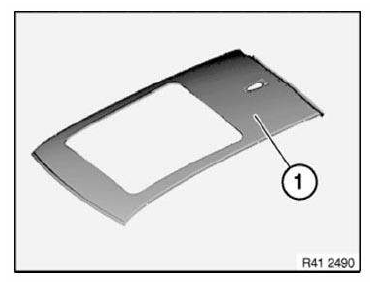
Following new body parts are required:
- (1) Roof outer skin panel, panorama glass sunroof
Following CONSUMABLES are required:
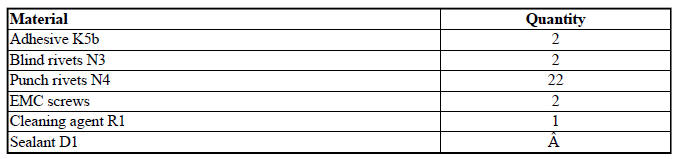
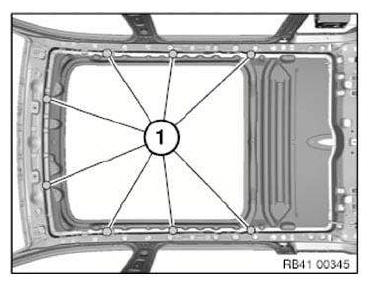
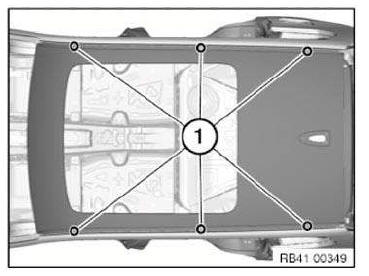
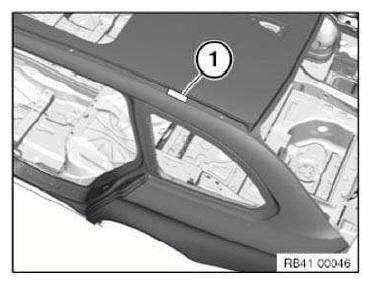
Removing roof outer skin: Open welded connections in area (1).
Open brazed connections in areas (1) by grinding.
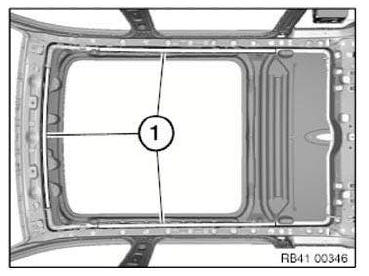
Open welded connections in areas (2).
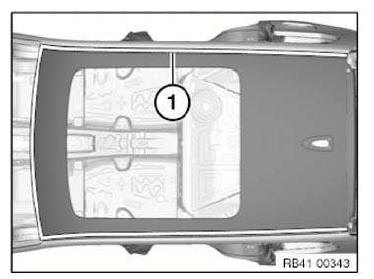
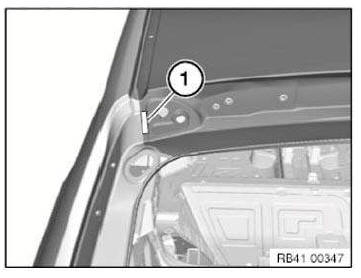
Release screws (1).
OPEN bonded connections in areas (1).
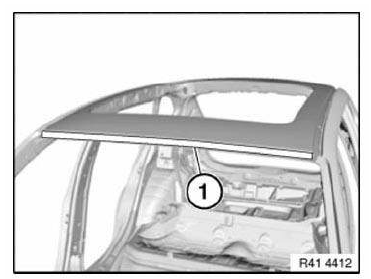
Take off roof outer skin.
Preparation of new part: Adjust roof outer skin to fit and secure.
In area (1) drill 1 Ø 4.2 mm hole for blind rivet.
Shown on left side, right side identical.
Remove new part again and deburr bore holes.
IMPORTANT: Do not grind/sand new part in area of bonding surfaces.
Installing roof outer skin: Clean all bonding surfaces on vehicle and on new part with cleaning agent R1.
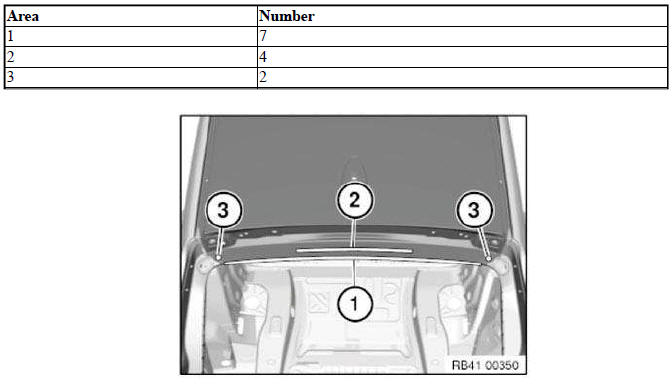
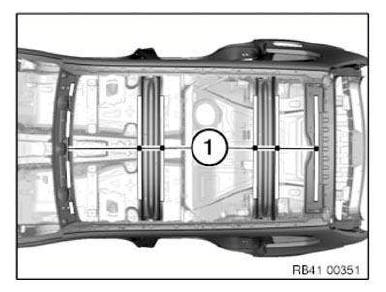
In areas (1), apply sealant D1 in the same way as in series standard.
Apply adhesive in area (2).
Apply a little more adhesive to node of A-pillar.
NOTE: Excess material at the nodes is later used for spreading to side frame.
Place roof outer skin with helpers evenly and centrally on vehicle, adjust to fit and secure.
Rivet roof outer skin with blind rivets.
Insert screws (1) and tighten down.

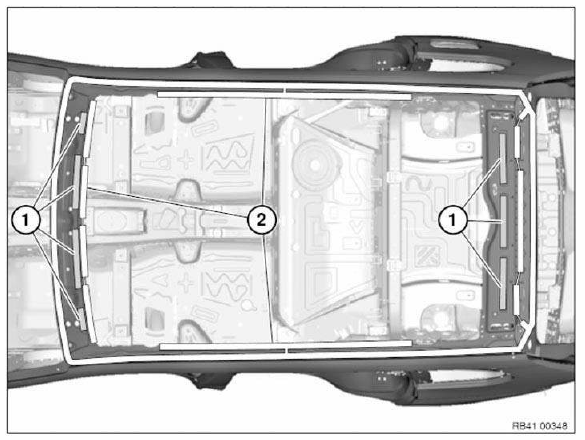
Secure roof outer skin with screws and nuts M6 at mounting holes (1) of roof rails.
In area (1) rivet roof outer skin with 9 N4 punch rivets.
Use N4 punch rivets in areas (1) to (3).
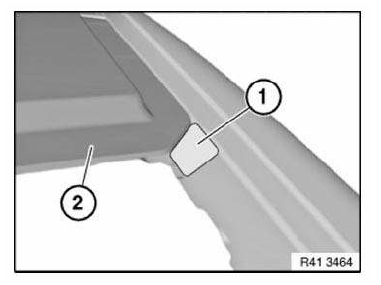
A-pillar nodes: Adapt step (1) between roof outer skin (2) and A-pillar with emerging adhesive. Remove excess adhesive.
IMPORTANT: Do not use any cleaning agents containing solvents.
Do not leave any traces of sharp edges as this could compromise the tightness of the subsequent bond.
Install hinges for tailgate until the adhesive has hardened.
Avoid contact between emerging adhesive and hinges! Remove excess adhesive.
IMPORTANT: Do not use any cleaning agents containing solvents.
Seal adhesive areas and blind rivets with sealant D1.
IMPORTANT: Spread excess adhesive in roof trim strip channel. Mounting surfaces of clips for roof trim strips must not be moistened with adhesive.
Operation is described on the left side. Right side identical.
Graphic similar.
Fit an EMC SCREW after adhesive has hardened in area (1).
In so doing, bear in mind subsequent fitting of roof trim strip/roof rail!
Replacing roof outer skin (normal roof)
Refer to repair instructions ROOF OUTER SKIN WITH SLIDE/TILT SUNROOF for procedure and carry over schematically to the vehicle.
STRIP DOWN VEHICLE
Installing roof outer skin
Apply sealant in areas (1) in the same way as in series standard.
Stripping operations - replacing roof outer skin (normal roof)
NOTE: Owing to the different engine variants and equipment specifications, not all the components are taken into consideration.
The following list basically represents the removal sequence.
- Disconnect battery
- Remove cowl panel cover
- Remove and install windscreen
- Remove and install rear lid
- Remove and install headlining.
- Remove and install left roof trim strip
- Remove and install right roof trim strip
- Remove and install roof aerial
- Remove both tailgate hinges
- Partially release tailgate seal.
Stripping operations - replacing roof outer skin (version with panorama glass roof)
NOTE: Owing to the different engine variants and equipment specifications, not all the components are taken into consideration.
The following list basically represents the removal sequence.
- Disconnect battery
- Remove cowl panel cover
- Remove and install windscreen
- Remove and install rear lid
- Remove and install headlining.
- Remove and install panorama glass roof
- Remove and install left roof trim strip
- Remove and install right roof trim strip
- Remove and install roof aerial
- Remove both tailgate hinges
- Slightly release tailgate seal

 Dash cowl
REPLACE THE A-PILLAR ON THE OUTSIDE LEFT IN THE AREA OF THE
WINDSCREEN
Read contents of BODY, GENERAL.
Remove or cover those vehicle components i ...
Other materials:
BMW X3 (F25) Owners Manual > Notes: Vehicle features and options
This Owner's Manual describes all models and
all standard, country-specific and optional
equipment that is offered in the model series.
Therefore, in this Owner's Manual, we also describe
and illustrate features that are not available
in your vehicle, e.g., because of the selected
optional f ...
