BMW X3 (F25) Service & Repair Manual: Front lid
- Adjusting engine compartment lid
- Removing and installing engine compartment lid
- Removing and installing/replacing hinge for engine compartment Lid
Adjusting engine compartment lid
IMPORTANT: Do not damage adjoining body components! Minor corrections (realignment work) are permitted if the existing adjustment options are not sufficient.
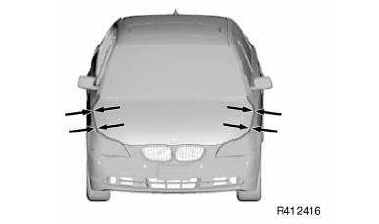
Observe GAP DIMENSIONS.
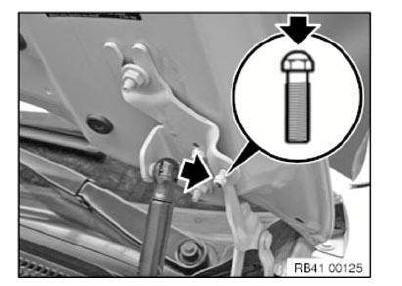
NOTE: Stop screw must not be damaged or missing. If necessary, replace engine compartment lid hinge.
The stop screw is preset and must not be used to adjust the engine compartment lid!
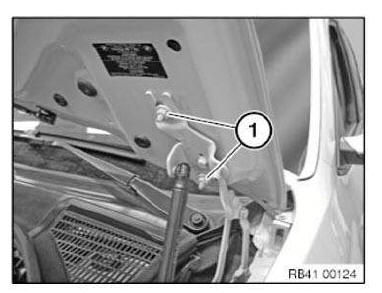
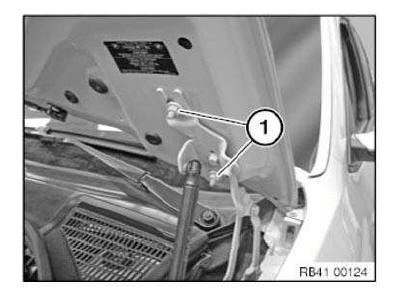
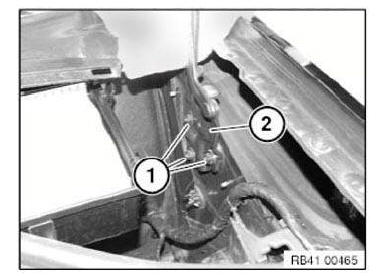
Slacken nuts (1) of hinges on left and right.
Engine compartment lid must be able to be moved.
NOTE: If adjustment range is not sufficient, slacken screws on body and slide hinge.
(Refer to operation: Height adjustment at hinge)
Adjust engine compartment lid sideways and lengthways.
Strikers must snap into place in engine compartment lid catch.
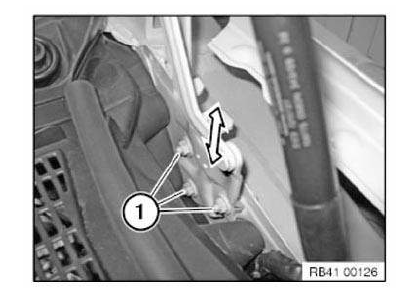
Height adjustment at hinge: Slacken screws (1) and adjust engine compartment lid.
Height adjustment at strikers: Unclip the anti-twist lock (1).
Adjust height by turning the striker (2).
Height adjustment of engine compartment lid to side panel by means of STOP PAD.
NOTE: The engine compartment lid is correctly adjusted in the front section by a combination of pulling the strikers and pressing the stop pads.
Incorrect adjustment results in either wobbling of the engine compartment lid or sluggish unlocking.
IMPORTANT: Check function of retaining hook.
After Installation note:
- Tighten all screws and nuts to specified torque.
- Touch up unpainted surfaces in the appropriate colour.
- If necessary, adjust front side panels.
Removing and installing engine compartment lid
Necessary preliminary tasks:
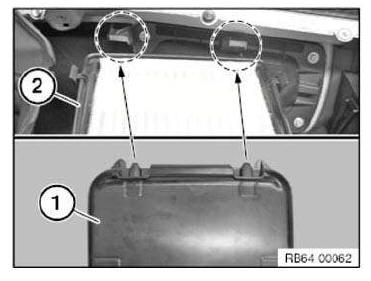
- Remove RIGHT MICROFILTER HOUSING COVER .
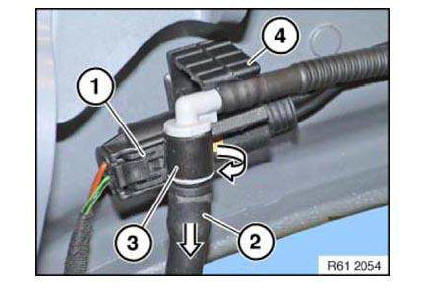
Turn clamp (3) in direction of arrow and washer fluid line (2) in direction of arrow.
Disconnect plug connection (1) and remove from holder (4).
IMPORTANT: Support the engine compartment lid. Removal of the engine compartment lid must be carried out with the assistance of a second person.
Unscrew nuts (1).
Remove engine compartment lid.
Installation note: Install engine compartment lid at screw locations to on hinge.
If necessary, adjust ENGINE COMPARTMENT LID.
Removing and installing/replacing hinge for engine compartment Lid
WARNING: Support engine compartment lid in fully opened position with suitable apparatus. Risk of injury.
Necessary preliminary tasks: Remove left-hand GAS PRESSURE SPRING for engine compartment lid REMOVE left microfilter housing cover
Shown on left side. Right side identical.
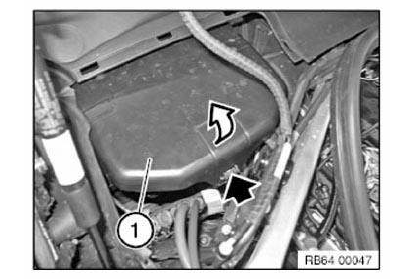
Remove filter cover (1) in direction of arrow.
Installation note: Ensure that latch mechanisms on the microfilter housing cover (1) are correctly seated under retaining lugs on microfilter housing (2).
Retaining lugs on microfilter housing (2) must be neither bent nor damaged.
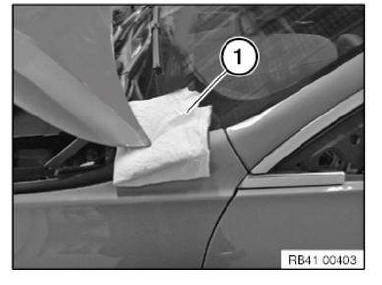
Position suitable cloths (1) without any play under engine compartment lid.
IMPORTANT: Make sure the engine compartment lid is supported!
Release nuts (1) and remove partition wall (2).
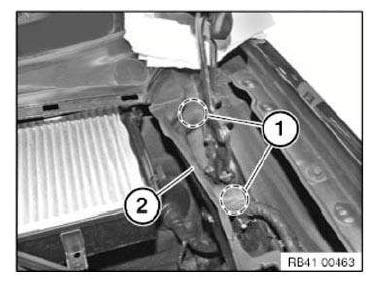
IMPORTANT: After screws have been slackened no lateral forces must be exerted on the engine compartment lid!
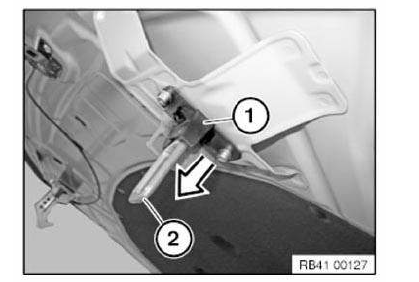
Release screws (1).
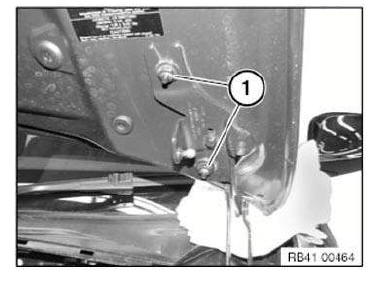
Release screws (1) and remove hinge (2).
Installation note: ADJUST hinge together with engine compartment lid.
REMOVING AND INSTALLING/REPLACING RIGHT HINGE FOR ENGINE COMPARTMENT LID
Operation is identical to removing and installing "LEFT HINGE FOR ENGINE COMPARTMENT LID".
 Rear side doors
...
 Rear lid
...
Other materials:
BMW X3 (F25) Service & Repair Manual > Suspension: Pump and oil supply
INSTRUCTIONS FOR REMOVING AND INSTALLING EAR CLIPS
Special tools required:
32 1 260
NOTE: The work steps are show on assorted components.
Ear clip must always be replaced.
To remove an ear clip, place special tool 32 1 260 at right angles to ear and cut ear open.
The ear clip can be f ...
