BMW X3 (F25) Service & Repair Manual: Output shaft
NOTES ON REMOVING AND INSTALLING LOW PROFILE BAND CLAMPS
Special tools required:
- 31 5 200
IMPORTANT: During removal Low Profile band clamp (dotted line) is overstretched and must not be reused!
REMOVING AND INSTALLING/REPLACING LEFT OR RIGHT OUTPUT SHAFT
Special tools required:
- 31 5 110
NOTE: If the wishbone is detached from the front axle support, it will be necessary to carry out the wheel alignment procedure.
Necessary preliminary tasks:
- Remove FRONT WHEEL .
- Remove front UNDERBODY PROTECTION.
- Remove ANTI-ROLL BAR LINK FROM ANTI-ROLL BAR.
IMPORTANT: The radial shaft seal for the output shaft should be replaced every time the output shaft is removed and installed.
IMPORTANT: Circlip (1) in the bearing support/front differential must be replaced when fitting the output shaft!
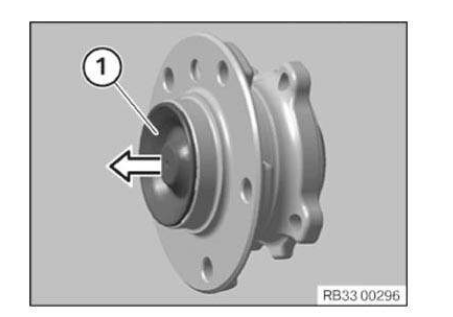
If necessary, remove visual protection cap (1).
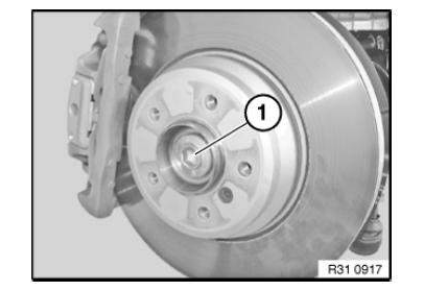
Release collar bolt (1), press brake pedal to floor for this purpose.
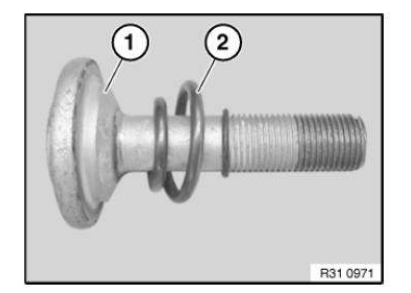
Installation note:
- Renew collar bolt (1) and compression spring (2).
- Pay attention to installation position of compression spring (2).
- Keep collar bolt and spur toothing of bearing/propeller shaft clean and free of grease
- Follow installation note of the spur gearing.
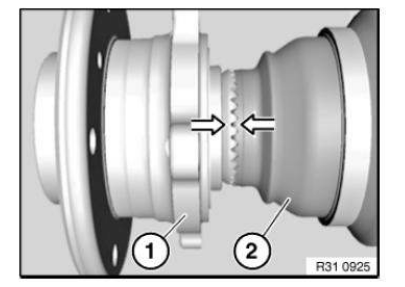
IMPORTANT: Note on installation must be observed without fail!
Installation note:
- Spur gearing of bearing (1) and output shaft (2) must be installed form-fit (tooth in tooth)!
- Tighten collar bolt and compression spring by hand.
- Check whether spur gearing is locked tooth in tooth by reciprocally rotating wheel hub/output shaft.
- Once a form-fit has been ensured, tighten to final torque.
Detach TIE ROD END FROM SWIVEL BEARING .
Release WISHBONE ON FRONT AXLE CARRIER.
Turn swivel bearing to one side.
Remove output shaft from swivel bearing/wheel bearing.
Front differential: Knock out output shaft (2) from the front axle differential with an aluminium drift (1).
Installation note: Renew RADIAL SHAFT SEAL IN FRONT AXLE DIFFERENTIAL.
Coat sealing lips with front differential oil.
Replace circlip and slide in output shaft, overcoming resistance of circlip. Output shaft must snap audibly into place.
IMPORTANT: High installation forces indicate that the gearing on the output shaft/rear axle final drive side gear are damaged/deformed! Check gearing and replace components if damaged.
Bearing support: Press output shaft with special tool 31 5 110 out of bearing support and remove.
Installation note: Replace SHAFT SEAL IN BEARING SUPPORT and coat sealing lips with front differential oil.
Replace circlip and slide in output shaft, overcoming resistance of circlip. Output shaft must snap audibly into place.
IMPORTANT: High installation forces indicate that the gearing on the output shaft/rear axle final drive side gear are damaged/deformed! Check gearing and replace components if damaged.
After installation:
- Check OIL LEVEL IN FRONT AXLE DIFFERENTIAL, correct if necessary.
- Carry out wheel alignment procedure .
REPLACING AN OUTPUT SHAFT GAITER (ON TRANSMISSION SIDE) (OUTPUT SHAFT REMOVED)
NOTE: Procedure is described in BOTH OUTPUT SHAFT GAITERS.
REPLACING RADIAL SHAFT SEAL FOR OUTPUT SHAFT, LEFT
Special tools required:
- 31 5 130
Necessary preliminary work:
- Remove LEFT OUTPUT SHAFT.
Installation note: Drive in radial shaft seal with special tool 31 5 130 as far as it will go.
After installation:
- Check FRONT AXLE GEARBOX OIL LEVEL, correct if necessary.
REPLACING RADIAL SHAFT SEAL FOR OUTPUT SHAFT, RIGHT
Special tools required:
- 31 5 130
Necessary preliminary work:
- Remove RIGHT OUTPUT SHAFT.
Installation note: Drive in radial shaft seal with special tool 31 5 130 as far as it will go.

 Front axle
...
Other materials:
BMW X3 (F25) Owners Manual > Notes: Vehicle features and options
This Owner's Manual describes all models and
all standard, country-specific and optional
equipment that is offered in the model series.
Therefore, in this Owner's Manual, we also describe
and illustrate features that are not available
in your vehicle, e.g., because of the selected
optional f ...
