BMW X3 (F25) Service & Repair Manual: Front trim panel
NOTES ON THE REPAIR TECHNIQUE USED IN THE MAIN GROUP 41
Two different repair techniques are used in body repair.
These are welding and bonding/riveting.
If the repair instructions do not specify a repair technique, then welding must always be used.
The bonding/riveting repair technique is always described in detail in the repair instructions.
Quality standards must be met.
Removing and installing front panel
Necessary preliminary tasks:
- Remove FRONT BUMPER TRIM .
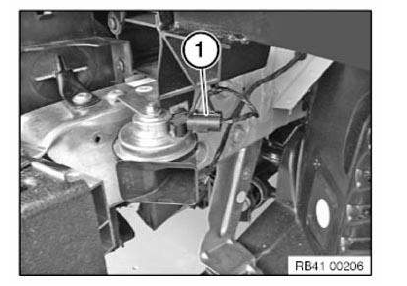
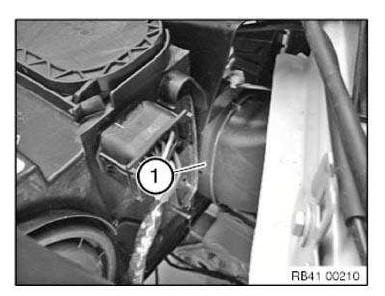
Unlock plug-in connector (1) for horn and disconnect.
Shown on left side, right side identical.
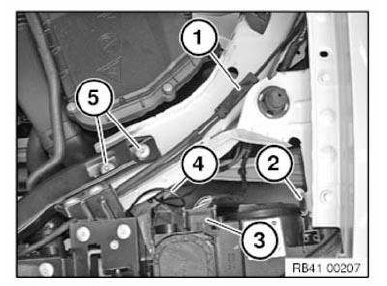
Open clutch (1) and detach Bowden cable for hood/bonnet release.
Release screw (2).
Unlock plug connection (3) for headlight and disconnect.
Unlock plug connection for wiring harness (4) and disconnect.
Release screws (5).
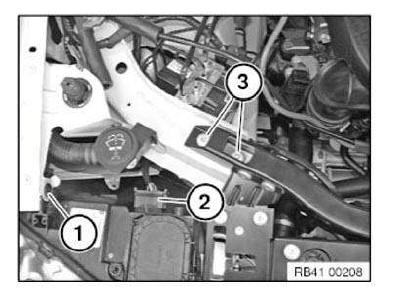
Release screw (1).
Unlock plug connection (2) for headlight and disconnect.
Release screws (3).
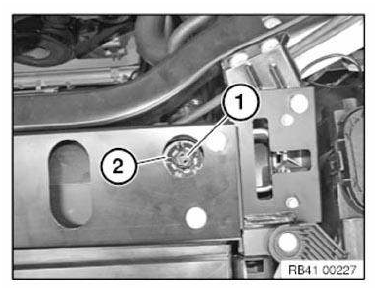
Pull out retainer (2) upwards.
Press the 5 latch mechanisms inward and remove bearing pin (2) upward.
Shown on left side, right side identical.
In case of damage during disassembly, replace bearing pin (plug).
Release screws (1) on engine support on both sides and remove front panel.
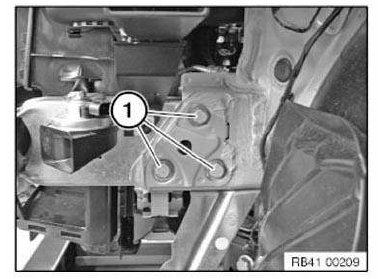
Installation note: When mounting the front panel, ensure that the intake air channel (1) is correctly positioned.
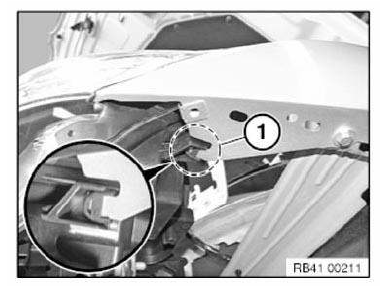
Installation note: In area (1), ensure that the side wall and headlight are correctly positioned.
Replacing front left or right side wall holder
NOTE: Read contents of BODY, GENERAL.
Side wall removed.
Transfer the systematic diagram onto the respective holder version.
General information: Procedure OBSERVE repair stage 2! Following new body parts are required:
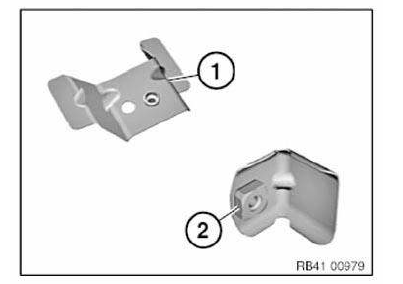
- (1) Holder, side wall, front (variant 1)
- (2) Holder, side wall, front (variant 2)
Following CONSUMABLES are required:

Removal of side wall holder (variant 1): Release welded connections in areas (1) and remove holder (2).
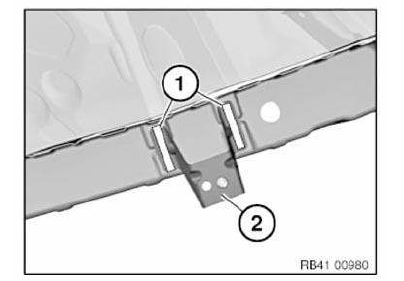
Preparation of new part: Adjust new part in conjunction with side panel in front to fit.
In area of bonding surfaces (1), set 2 4.2 mm dia. bore holes (2) for blind rivetsN3.
Remove new part and deburr holes.
IMPORTANT: Do not grind bonding surfaces down or off.
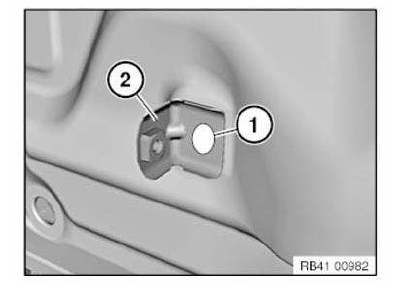
Installation of side wall holder: Clean all bonding surfaces with cleaning agent R1.
Apply adhesive to bonding surfaces.
Install new part and rivet with blind rivets.
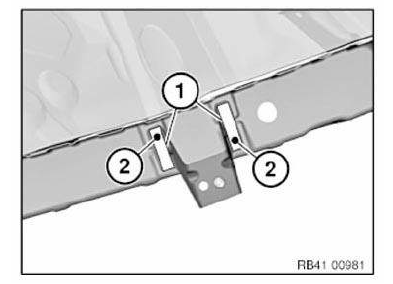
Removal of side wall holder (variant 2): Release welded connection in area (1) and remove holder (2).
Preparation of new part: Fit in new part.
In area of adhesive surface (1), drill a 4.2 mm dia. bore hole (2) for blind rivet N3.
Remove new part and deburr holes.
IMPORTANT: Do not grind bonding surfaces down or off.
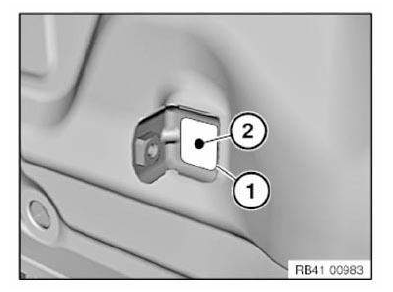
Installation of side wall holder: Clean all bonding surfaces with cleaning agent R1.
Apply adhesive to bonding surface.
Install new part and rivet with blind rivet.
 Dash cowl
REPLACE THE A-PILLAR ON THE OUTSIDE LEFT IN THE AREA OF THE
WINDSCREEN
Read contents of BODY, GENERAL.
Remove or cover those vehicle components i ...
 Rear trim panel
...
Other materials:
BMW X3 (F25) Owners Manual > Notes: Reporting safety defects
For US customers
The following only applies to vehicles owned
and operated in the US.
If you believe that your vehicle has a defect
which could cause a crash or could cause injury
or death, you should immediately inform
the National Highway Traffic Safety Administration
NHTSA, in addition t ...
