BMW X3 (F25) Service & Repair Manual: Auxiliary. heater with control elements
- Initializing telestart hand-held transmitter
- Removing and installing or replacing complete independent heater with bracket
- Removing and installing or replacing fuel pump (auxiliary heater)
- Removing and installing/replacing complete electric auxiliary heating
- Removing and installing/replacing intake silencer for independent/auxiliary heater
- Removing and installing/replacing silencer (auxiliary heater)
- Replacing changeover valve for independent/auxiliary heating
- Replacing turbocharger coolant pump for auxiliary heating
Initializing telestart hand-held transmitter
NOTE: The Telestart hand-held transmitter must be initialized when:
- Hand-held transmitter is replaced
- Car Access System control unit is replaced
The auxiliary heater is switched on with the hand-held transmitter and at a preselected switch-on time under an ambient temperature of approx. 15 ºC.
Heating can be activated directly in the Central Information Display at any ambient temperature. To do so, go to the parking function menu under direct operation and mark the auxiliary heating box.
NOTE: Initialization can only be carried out with the BMW diagnosis system.
Follow instructions and specifications in procedure.
Service functions:
- Complete vehicle
- Body
- Air conditioning function
- Telestart transmitter
- Initialization
Removing and installing or replacing complete independent heater with bracket
WARNING: Risk of burning! Work on auxiliary heater may only be carried out when it has cooled down.
NOTE: CLAMP OFF coolant hoses on independent heater.
Recycling
Fuel escapes when fuel lines are detached. Have a suitable collecting vessel ready.
Catch and dispose of escaping fuel.
Observe country-specific waste disposal regulations.
Necessary preliminary tasks:
- Remove LEFT WHEEL ARCH COVER
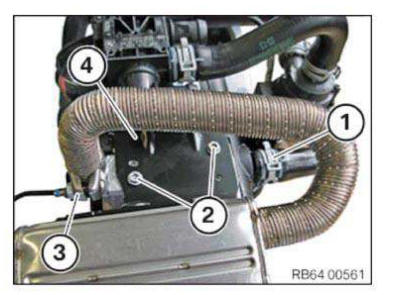
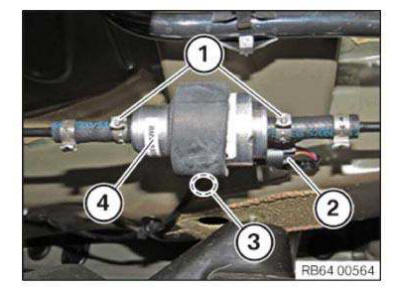
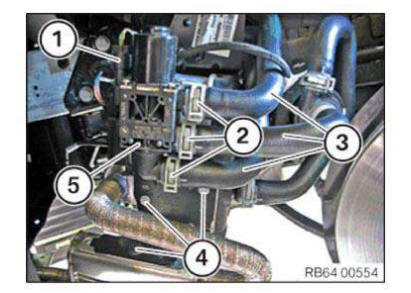
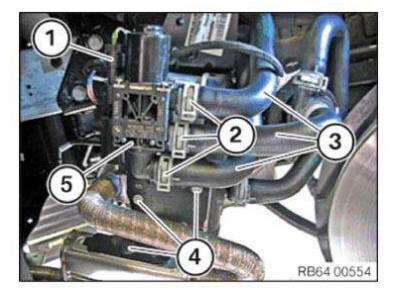
Removal:
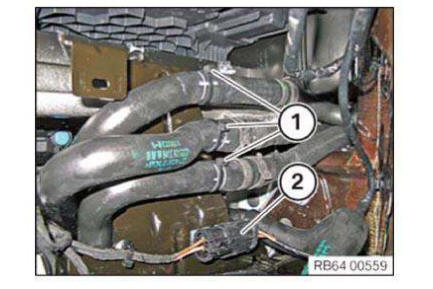
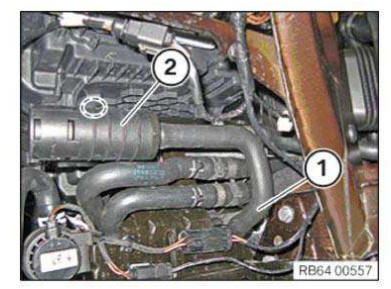
Unclip intake silencer in marked area (2).
Release screws (2).
Disconnect fuel line (3).
Unlock connector (4) and disconnect.
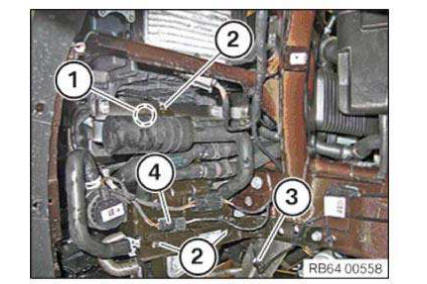
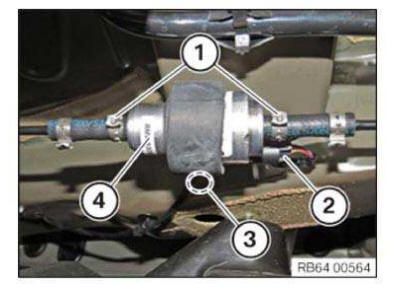
Release screws (1).
Unclip the fuel line (2).
Detach the holder (3).
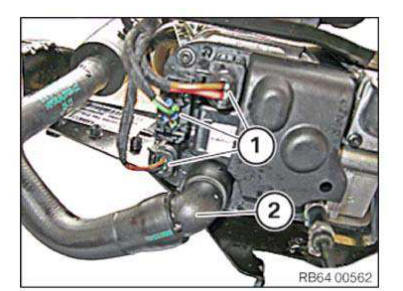
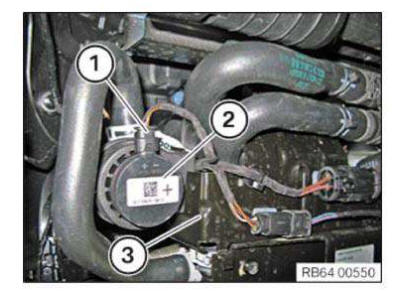
Cut open cable straps (1).
Unlock and disconnect connector (2).
IMPORTANT: Secure auxiliary heater (2) against falling off/down!
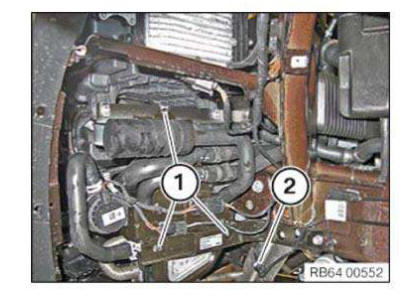
Release spring band clamps (1) and detach coolant hoses.
Remove auxiliary heater (2).
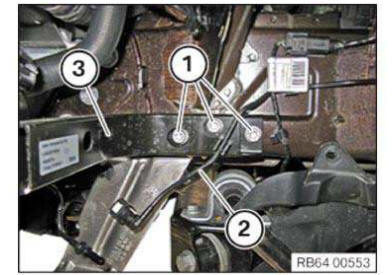
Replacement:
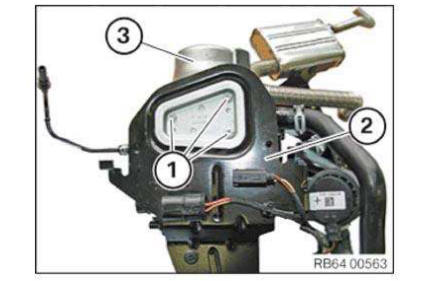
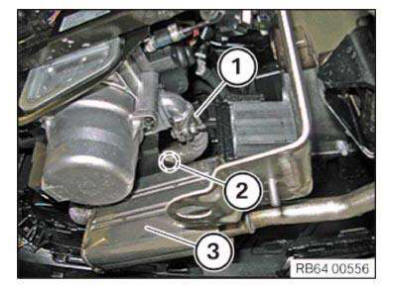
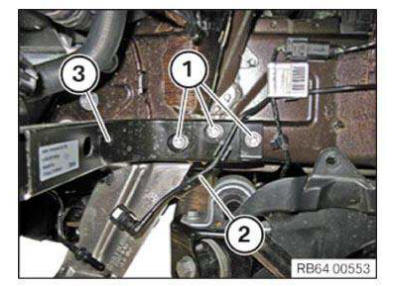
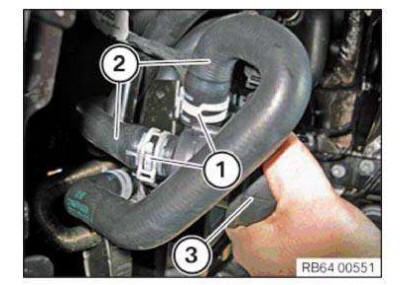
Release spring band clamp (1).
Release screws (2).
Slacken clamp (3) and pull off exhaust hose.
Take off holder (4).
Unlock and disconnect connector (1).
Pull off air intake hose (2).
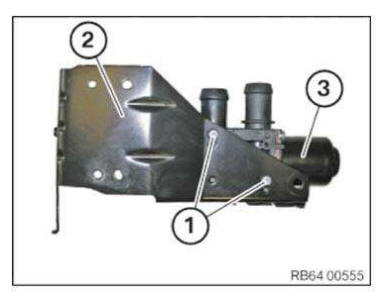
Release screws (1).
Remove holder (2) from auxiliary heater (3).
Installation:
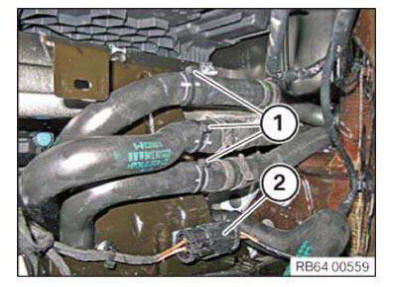
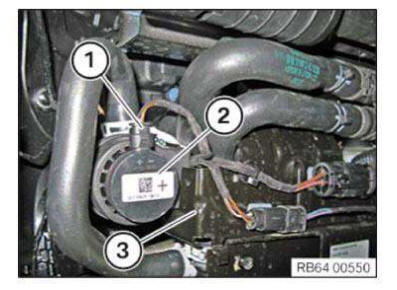
Position auxiliary heater (2) correctly.
Attach coolant hoses and secure by spring band clamps (1).
Connect connector (2).
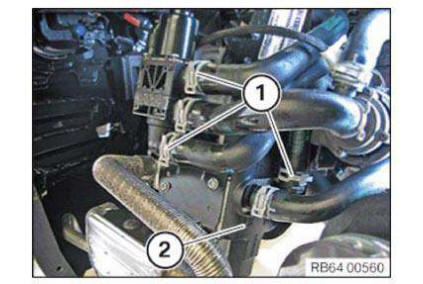
Replace and secure cable straps (1).
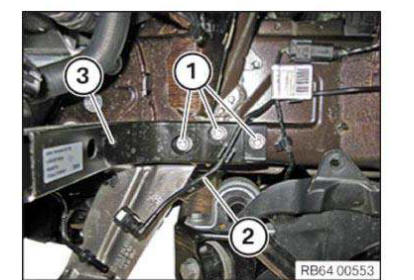
Position the holder (3) correctly.
Tighten down the screws (1).
Clip in the fuel line (2).
Tighten screws (2).
Connect fuel line (3).
Connect the connector (4).
Clip in intake silencer in marked area (2).
Required reworking:
- Install LEFT WHEEL ARCH COVER
- Fill and vent cooling system and check for leaks.
Removing and installing or replacing fuel pump (auxiliary heater)
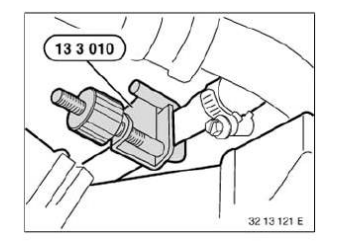
Special tools required:
- 13 3 010
Recycling
Fuel escapes when fuel lines are detached. Have a suitable collecting vessel ready.
Catch and dispose of escaping fuel.
Observe country-specific waste disposal regulations.
Seal off fuel hoses at fuel pump with special tool 13 3 010 .
Necessary preliminary work:
- Remove LEFT UNDERBODY PANELLING
Removal:
Release hose clamps (1) and pull fuel lines off.
Unlock and disconnect connector (2).
Release screw (3).
Remove electric fuel pump (4).
Installation:
Mount electric fuel pump (4) and tighten screw (3).
Insert fuel lines and fasten with new hose clamps (1).
Connect connector (2).
NOTE: Observe direction of flow of fuel pump (4).
Required reworking:
- Mount LEFT UNDERBODY PANELLING
Removing and installing/replacing complete electric auxiliary heating
Risk of burning!
Carry out repair work only after engine has cooled down.
Necessary preliminary work:
- Remove SUPPORT FOR DASHBOARD
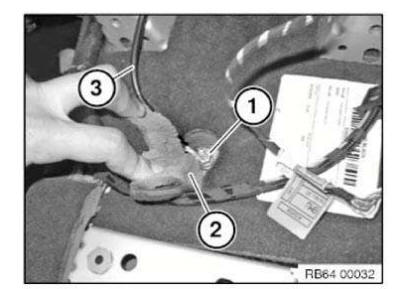
Fold up the carpet (2) as shown.
Slacken nut (1).
Take off earth cable (3).
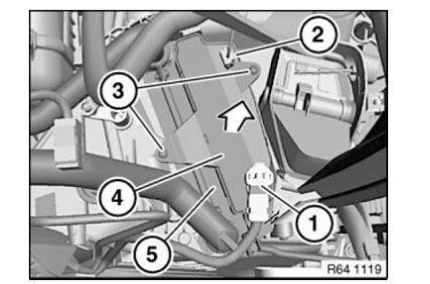
Installation note: Ensure correct line routing.
Unlock plug connections (1) and (2) and disconnect.
Release screws (3).
Remove electric auxiliary heater (4) in direction of arrow from the heating and air conditioning unit (5).
Removing and installing/replacing intake silencer for independent/auxiliary heater
WARNING: Risk of burning! Work on auxiliary heater may only be carried out when it has cooled down.
Necessary preliminary work:
- Remove FRONT LEFT WHEEL ARCH COVER
Removal:
Pull air intake hose (1) off stationary/auxiliary heater.
Unclip intake silencer (2) in marked area.

Installation:
NOTE: The mounting clip on the intake silencer must not be damaged!
Clip in intake silencer (2) in marked area.
Connect air intake hose (1) to stationary/auxiliary heater.
Required reworking:
- Mount FRONT LEFT WHEEL ARCH COVER
Removing and installing/replacing silencer (auxiliary heater)
WARNING: Risk of burning! Work on auxiliary heater may only be carried out when it has cooled down.
Necessary preliminary work:
- REMOVE FRONT LEFT WHEEL ARCH TRIM
Removal:
Slacken clamp (1).
Release screw (2) and remove silencer (3).
Installation:
Position silencer (3) correctly.
Tighten down screw (2).
Tighten clamp (1).

Required reworking:
- Install FRONT LEFT WHEEL ARCH COVER
Replacing changeover valve for independent/auxiliary heating
WARNING: Risk of scalding! Only perform the following repair work on an engine that has cooled down.
FOLLOW NOTES FOR REPAIR WORK ON COOLING SYSTEM .
NOTE: DISCONNECT coolant hoses from changeover valve for independent/auxiliary heater.
Necessary preliminary tasks:
- REMOVE FRONT LEFT WHEEL ARCH COVER
Removal:
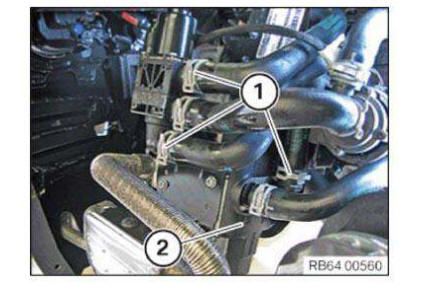
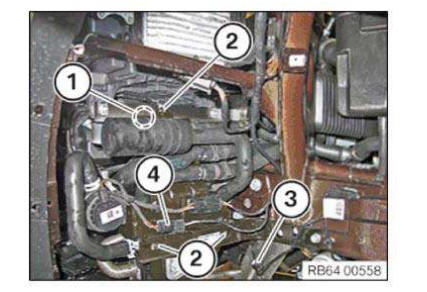
Release screws (1).
Disconnect fuel line (2).
Release screws (1).
Unclip the fuel line (2).
Detach the holder (3).
IMPORTANT: Risk of damage! Observe coolant through flow direction, mark coolant hoses before removing.
NOTE: If necessary, catch escaping coolant.
Unlock and disconnect the connector (1).
Release hose clips (2) and detach coolant hoses (3).
Release screws (4).
Remove changeover valve for independent/auxiliary heating (5).
Installation:
Replacement:
Release screws (1).
Remove holder (2) from changeover valve for independent/auxiliary heating (3).
Position changeover valve for independent/auxiliary heating (5) correctly.
Tighten screws (4).
Attach coolant hoses (3) correctly and secure with spring band clamps (2).
Connect the connector (1).
Position the holder (3) correctly.
Tighten down the screws (1).
Clip in the fuel line (2).
Tighten down the screws (1).
Connect fuel line (2).

Required reworking:
- INSTALL FRONT LEFT WHEEL ARCH COVER
- Vent cooling system and check on watertightness.
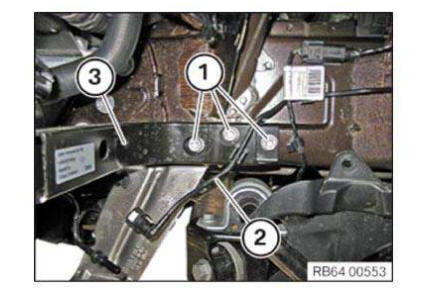
Replacing turbocharger coolant pump for auxiliary heating
Special tools required:
- 13 3 010
WARNING: Risk of burning! Repair work on the cooling system may only be carried out when it has cooled down.
Recycling
Coolant emerges when coolant lines are detached. Have a suitable collecting vessel ready.
Catch and dispose of emerging coolant.
Observe country-specific waste disposal regulations.
NOTE: CLAMP OFF coolant hoses
Necessary preliminary tasks:
- Remove WHEEL ARCH COVER, LEFT
Removal:
Unlock and disconnect the connector (1).
Lift auxiliary coolant pump (2) off of holder (3).
Disconnect coolant hoses (2) with special tool 13 3 010 Release spring band clamps (1) and pull off coolant hoses (2) from auxiliary coolant pump (3).
Installation: Attach coolant hoses (2) on auxiliary coolant pump (3) correctly and secure with spring band clamps (1).

Push auxiliary coolant pump (2) down into holder (3).
Connect the connector (1).
Required reworking:
- Install WHEEL ARCH COVER, LEFT
- Fill and vent cooling system and check for leaks.


Other materials:
BMW X3 (F25) Owners Manual > Notes: Reporting safety defects
For US customers
The following only applies to vehicles owned
and operated in the US.
If you believe that your vehicle has a defect
which could cause a crash or could cause injury
or death, you should immediately inform
the National Highway Traffic Safety Administration
NHTSA, in addition t ...
