BMW X3 (F25) Service & Repair Manual: Other flaps
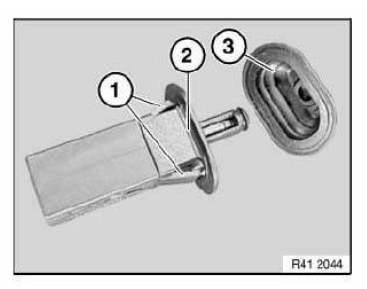
Removing and installing flap for fuel filler neck
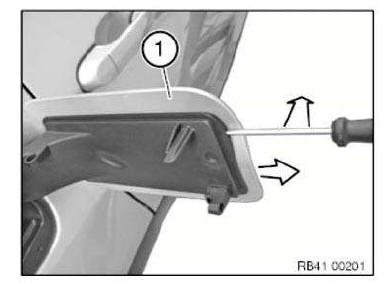
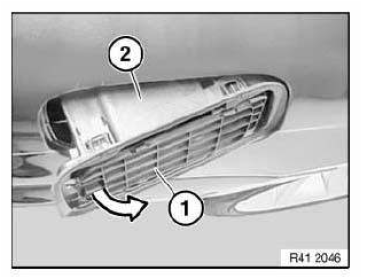
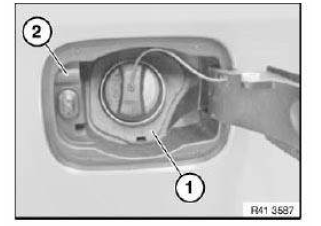
Open fuel filler flap.
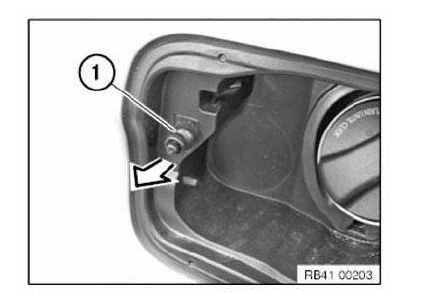
Use a suitable tool to lift the latch mechanism out toward the front in direction of arrow.
Detach fuel filler flap (1) in direction of arrow.
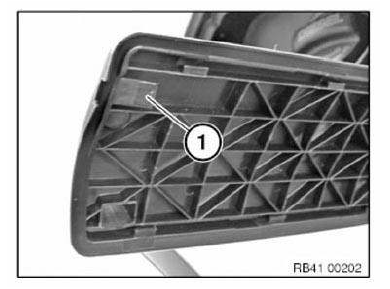
Installation note: The latch mechanism (1) must not be damaged.
If the latch mechanism is damaged, replace the COVER POT.
Replace cover bowl
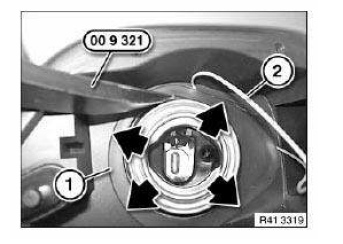
Special tools required:
- 00 9 321
- Remove FLAP FOR FUEL FILLER NECK
- Close the central locking system with open cap
NOTE: Carry over schematic diagram to the relevant vehicle type.
IMPORTANT: Deformation of the sheet metal flanges in the side panel and the wheel arch results in permanent vehicle leakage. Carry out removal/installation with great care.
Following new body parts are required :
- (1) Cover bowl
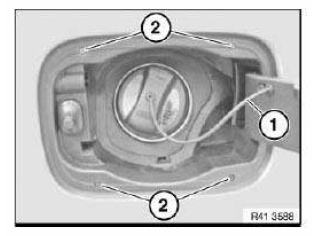
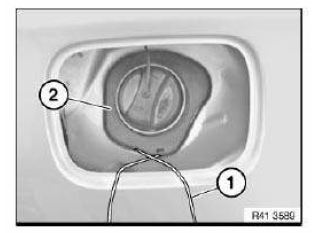
Release rubber collar (1) from cover bowl (2) by pressing inward.
NOTE: Rubber collar (1) remains attached to vehicle.
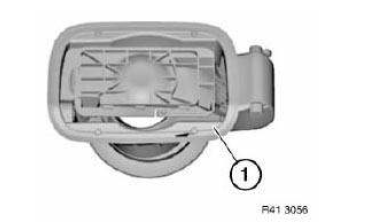
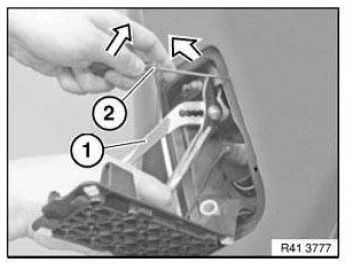
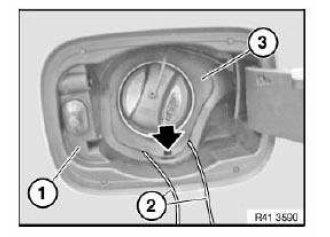
Remove ejector (1) in direction of arrow.
Lift out the retaining strap (1) and remove the lid.
Pierce markings (2) with a small screwdriver.
NOTE: For purposes of clarity, picture shows cover bowl removed.
Insert screwdriver to specified measurement a and unlock cover bowl catch.
Dimension a = approx. 10 mm

Keep cover bowl tensioned with pliers (1).
Unlock catches individually with screwdriver (2).
Unlock catches in following order:
- Top left
- Bottom left
- Top right
- Bottom right
Move screwdriver in opposite direction at both lower catches.
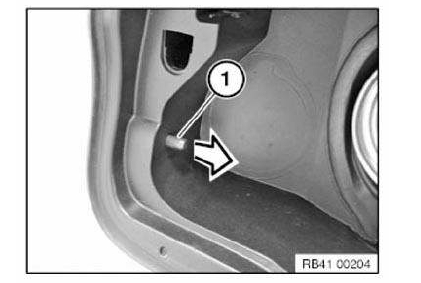
Slightly pull the locking pin (1) forward in the direction of the arrow, if applicable.
Close hinge arm (1).
IMPORTANT: Do not damage sheet metal flange of side wall.
Carefully twist out cover bowl (2) at first at rear in direction of arrow from side panel and remove.
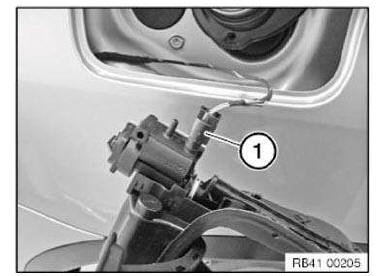
Unlock and disconnect plug connection (1) for actuator drive.
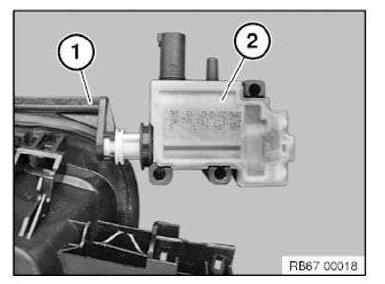
Use a suitable tool to unlock the tabs (1) on the front and back.
Remove actuator drive (3) from cover pot (2).

Release the actuator drive (2) by simultaneously turning and pressing the locking pin (1).
Installation note: Make sure the setting for the actuator drive (2) for the fuel filler flap is correct. It must be possible to lock or unlock the fuel filler flap completely.
Installing the cover bowl: Remove rubber collar (1) from new part.
Install and check the function of the actuator drive at the new part.
NOTE: When replacing rubber collar: Remove WHEEL ARCH COVER .
Graphic similar.
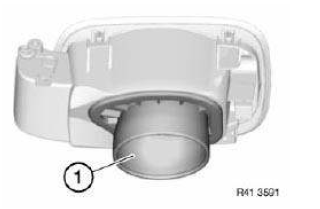
Check protective cap (3) for correct seating.
Catches (1) on ejector (2) must not be damaged. (Watertightness!)
Fit approx. 0.5 m long cable (1) in groove on rubber collar (2).
Install cover bowl (1).
Thread ends of cable (2) outwards.
Cover bowl must snap into place 4 times.
Align bottom rubber cup (3) with recess (arrow).
Pull rubber collar (3) over the cover bowl by pulling the ends of cables (2).
Slowly pull out cable ends (2).
Press rubber cup (1) into groove with special tool 00 9 321.
Carefully check cover bowl (2) in area of latch mechanisms for proper seating.
There must be no discernible gap between the sealing lip of the cover bowl and the side wall in the area.
(watertightness).
Make sure rubber collar (1) is correctly seated (watertightness).
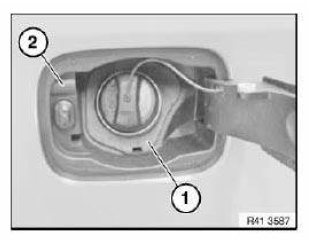
Perform function check of the lock/unlocking of the fuel filler cap.
 Rear lid
...

Other materials:
BMW X3 (F25) Service & Repair Manual > Brakes: Accelerator pedal actuation
REMOVING AND INSTALLING OR REPLACING ACCELERATOR PEDAL MODULE
Take off cap.
Release screw.
Pull accelerator pedal module upwards out of fixture.
Pull off connector (1).
Remove accelerator pedal module.
IMPORTANT:
Accelerator pedal module can only be replaced completely with ...
