BMW X3 (F25) Service & Repair Manual: Luggage compartment floor
- Replace luggage compartment floor and both side members (tail panel trim removed)
- Replacing left luggage compartment floor (tail panel has been removed)
- Replacing luggage compartment floor, middle section (tail panel removed)
- Stripping operations - replacing luggage compartment floor and both side members (tail panel removed)
- Stripping operations - replacing luggage compartment floor, middle (tail panel removed)
Replace luggage compartment floor and both side members (tail panel trim removed)
Read contents of BODY, GENERAL.
STRIP DOWN VEHICLE
Place vehicle on straightening bench.
Observe procedure of REPAIR STAGE 3.
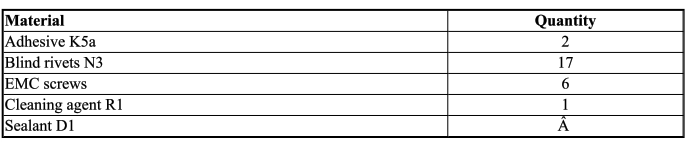
Following new body parts are required (refer to OVERVIEW OF CONSUMABLES):
- (1) Wheel arch extension, rear left and right
- (2) Luggage compartment floor, left and right
- (3) Side member, bottom rear left and right
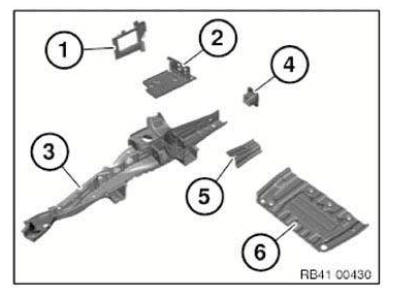
- (4) Fixture, impact absorber, left and right
- (5) Side member, top left and right
- (6) Battery tray
Following CONSUMABLES are required:
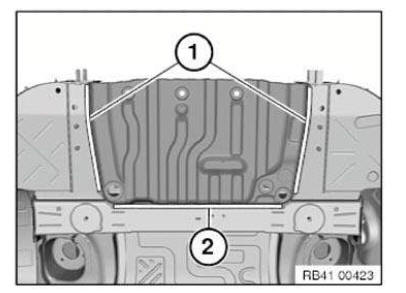
Removal of complete rear luggage compartment floor:
Operations described predominantly on the left side. Right side identical.
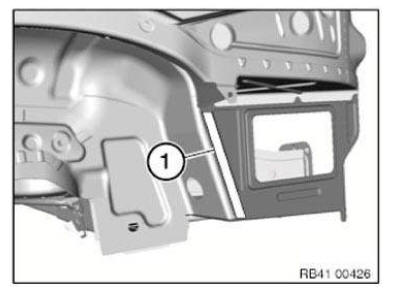
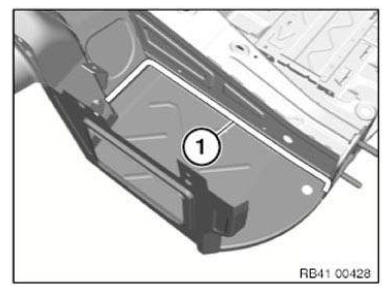
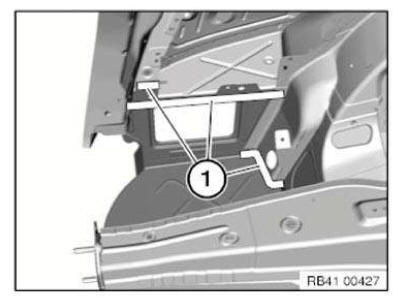
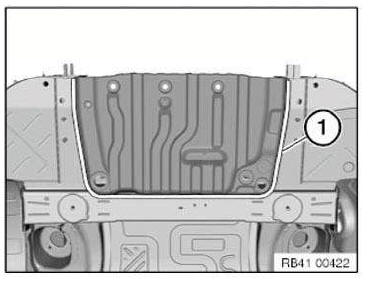
Open welded connections in area (1).
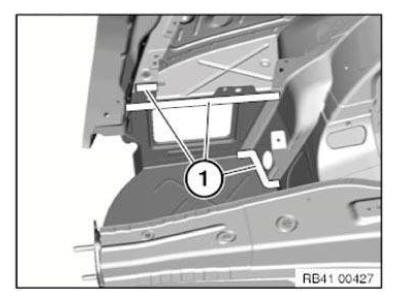
Open welded connections in areas (1).
Open welded connections in area (1).
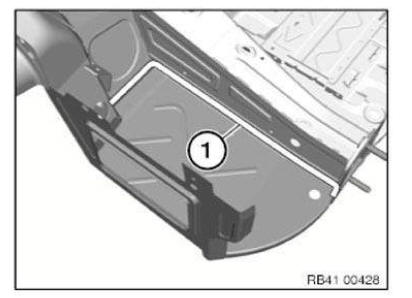
Remove the luggage compartment floor.
NOTE: Shown without side panel for purposes of clarity.
View from below.
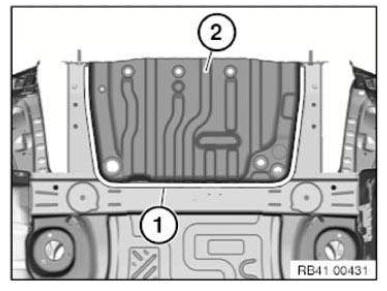
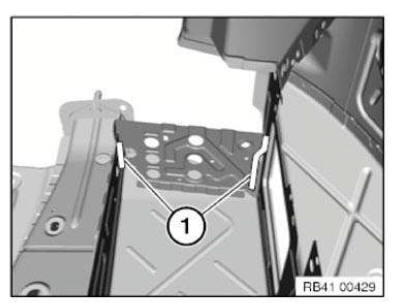
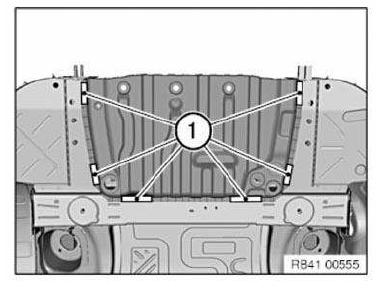
Open welded connections in the area (1) and remove battery tray (2).
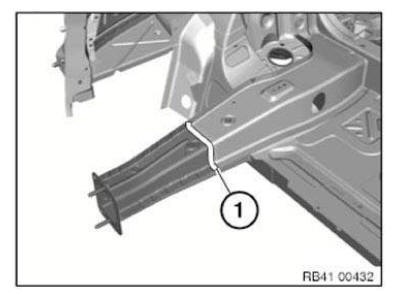
Open welded connections in area (1).
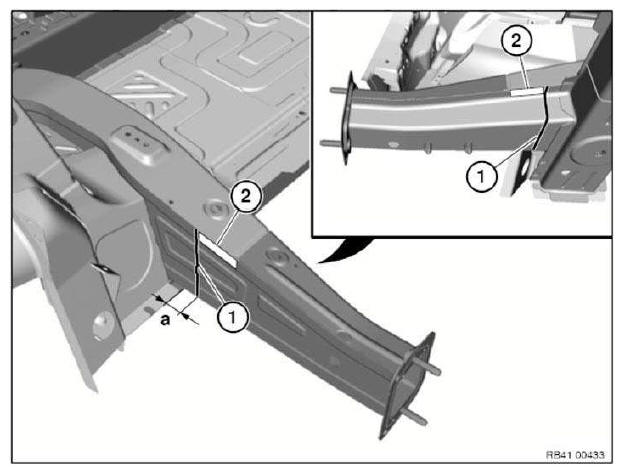
Mark severance cut (1) in accordance with dimension and cut.
IMPORTANT: Cut outer panel only.
Dimension a = 30 mm from wheel arch component edge.
Open welded connections in areas (2).
Remove side member.
New part preparation
Mark severance cut on side member in accordance with severance cut on vehicle and cut.
Prepare REINFORCEMENT PLATE for severance cut.
Adjust new parts to fit with alignment bracket or universal mount and secure.
In areas (1) and (2) set 4.2 mm dia. holes for blind rivets.

Remove new parts and deburr bore holes.
IMPORTANT: Do not grind new parts and body in area of bonding surfaces.
Installing side member and luggage compartment floor, left and right: Install new parts with alignment bracket or universal mount and weld analogue to series standard:
- Extension, side member
- Mounting, impact absorber
- Luggage compartment floor
- Wheel arch extension
Installing luggage compartment floor (battery tray): Clean all bonding surfaces with cleaning agent R1.
Apply adhesive to bonding surfaces.
Install new part and rivet with blind rivets.
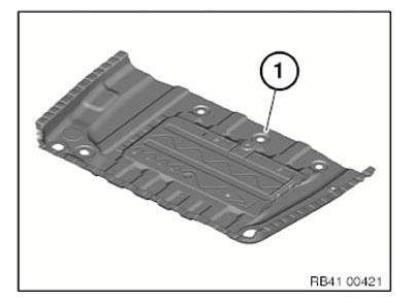
After hardening of the adhesive install 6 EMC SCREWS in the areas shown (1).
Replacing left luggage compartment floor (tail panel has been removed)
Observe procedure for REPAIR STAGE 3.
Read contents of BODY, GENERAL.
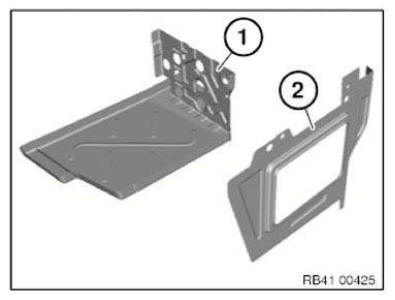
Following new body parts are required:
- (1) Luggage compartment floor, left section
- (2) Rear wheel arch extension
Removal
Open welded connections in area (1).
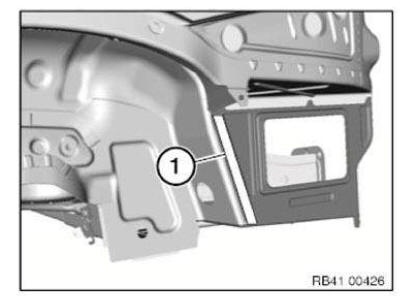
Open welded connections in areas (1).
Shown without side panel for purposes of clarity.
Open welded connections in areas (1).
Remove the luggage compartment floor.
Installation
Install new part and weld.
IMPORTANT: Only weld new part in areas (1) after installing tail panel!
Replacing luggage compartment floor, middle section (tail panel removed)
Read contents of BODY, GENERAL.
STRIP DOWN VEHICLE
Observe procedure for (REPAIR STAGE 2)!
Following new body parts are required:
- (1) Battery tray
Following CONSUMABLES are required:


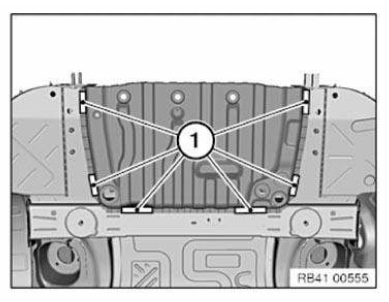
Removal of luggage compartment floor
Open welded connections in area (1).
Remove the luggage compartment floor.
New part preparation
Adjust new part in conjunction with tail panel and secure.
In areas (1) and (2) set 4.2 mm dia. holes for blind rivets.

Remove new parts and deburr bore holes.

IMPORTANT: Do not grind new part and body in area of bonding surfaces.
Installation of luggage compartment floor:
Clean all bonding surfaces with cleaning agent R1.
Apply adhesive to bonding surfaces.
Install new part and rivet with blind rivets.
After hardening of the adhesive install 6 EMC SCREWS in the areas shown (1).
Stripping operations - replacing luggage compartment floor and both side members (tail panel removed)
NOTE: Owing to the different engine variants and equipment specifications, not all the components are taken into consideration.
The following list basically represents the removal sequence.
- Remove positive battery cable (61 12 002 )
- Remove exhaust system.
- Remove heat shield
- Remove the left luggage compartment wheel arch panel (51 47 151 )
- Right luggage compartment wheel arch panel (51 47 161 )
- Remove front left and right wheel arch cover (51 71 041 )
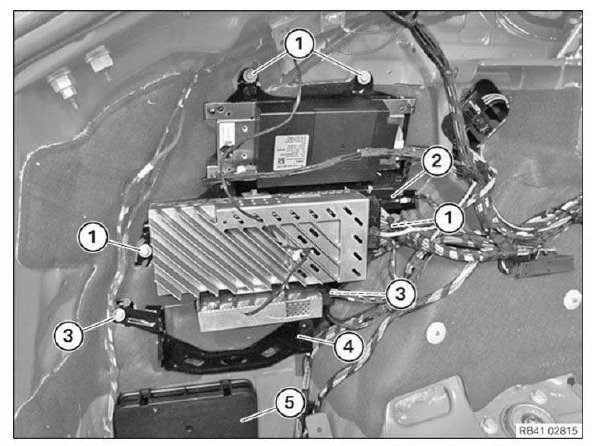
Release screws (1). Undo various connectors from control units and lay holder (2) to one side.
Release screws (3). Undo various connectors from control units and lay holder (4) to one side.
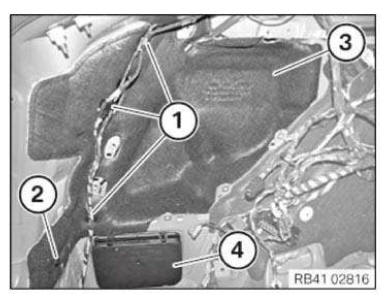
Release wiring harness at attachment points (1) and set aside.
Release wiring harness at attachment points (1) and lay to one side.
Lever out expanding rivet (2) and remove insulating mat (3).
Release latch mechanisms and remove rear ventilation (4).
Installation note:
The rear ventilation (4) must not be damaged. (watertightness).
All latch mechanisms must engage audibly.
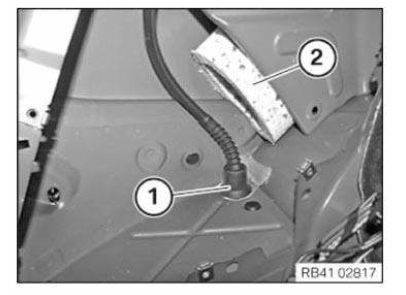
Release grommet (1) for water drain hose of the slide/tilt sunroof and lay to one side.
Remove foam insert (2).
Installation note: Please ensure correct installation of the grommet. (watertightness).
Release grommet (1) for water drain hose of the slide/tilt sunroof and lay to one side.
Installation note: Please ensure correct installation of the grommet. (watertightness).

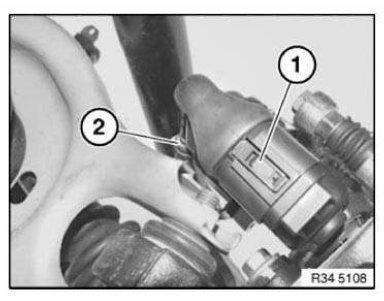
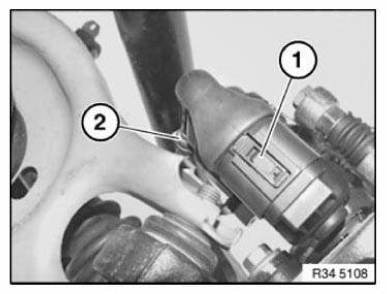
Disconnect plug connection (1) for the EMF.
Detach cable (2) from cable clip.
Release cable (2) from vehicle underbody.
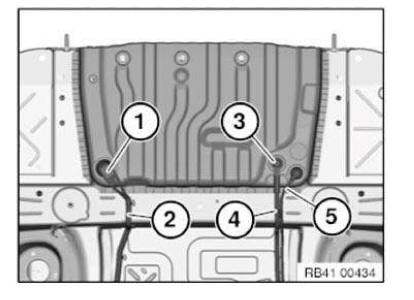
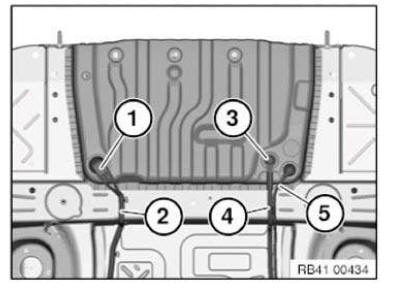
Undo grommet (1) and remove wiring harness (2) for the electromagnetic parking brake for the EMF towards the top.
Undo cable connector (3) for the positive battery cable and lay line (4) to one side.
Release grommet and feed out positive wire (5) to the side.
Stripping operations - replacing luggage compartment floor, middle (tail panel removed)
NOTE: Owing to the different engine variants and equipment specifications, not all the components are taken into consideration.
The following list basically represents the removal sequence.
- Remove positive battery cable (61 12 002 )
- Remove exhaust system.
- Remove exhaust system heat shield
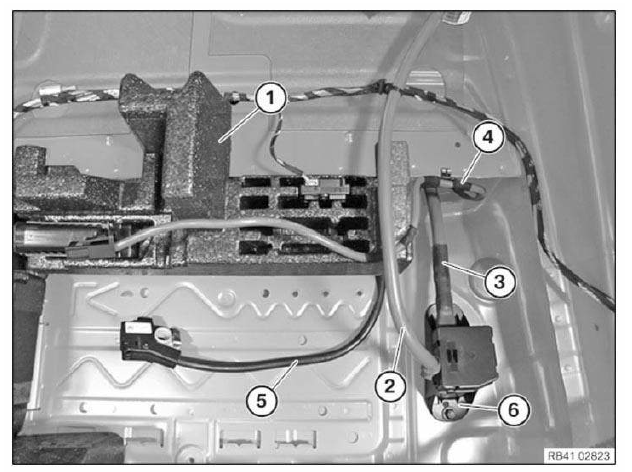
Remove control units from holder (1) and lay in the front. Remove holder (1).
Remove POSITIVE BATTERY CABLE (2).
Undo positive battery cable (3) from operation support point.
Feed positive battery cables (3) and (4) through opening in luggage compartment floor.
Release and remove battery earth lead (5) from body.
Release nuts and remove operation support point (6).
Disconnect plug connection (1) for the EMF.
Detach cable (2) from cable clip.
Release cable (2) from vehicle underbody.
Undo grommet (1) and remove wiring harness (2) for the electromagnetic parking brake for the EMF towards the top.
Undo connector (3) for the positive battery cable and put line (4) to one side.
Undo grommet and remove positive wire (5) towards the bottom and put to one side.
 Support members
...
 Wheel wells
...
Other materials:
BMW X3 (F25) Service & Repair Manual > Brakes: Handling brake fluids
Brake fluids could be mixed up accidentally with mineral oil products so it is important to leave them in their
original containers and not pour them into a different container.
CAUTION
If brake fluid accidentally comes into contact with your skin, wash it off with soap and water immediately. ...
