BMW X3 (F25) Service & Repair Manual: Microfilter
- Removing and installing/replacing right microfilter housing cover
- Replacing microfilter for interior ventilation
- Replacing recirculated air microfilter
Removing and installing/replacing right microfilter housing cover
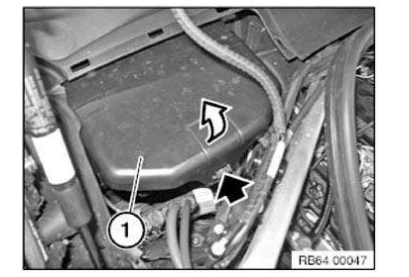
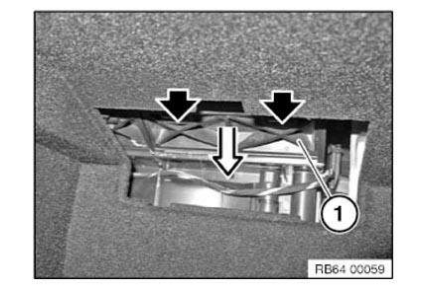
Remove sealing lips at marked points.
Unclip line and water hose (1) from cover (3).
Unlock retaining lug (2).
Feed out cover (3).
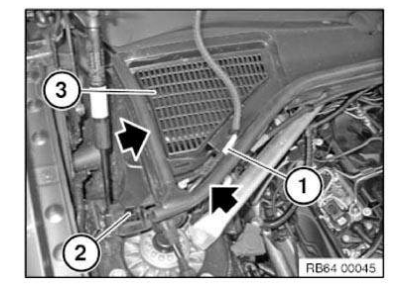
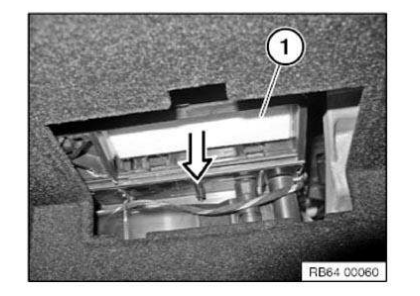
Cover tabs (1) must snap in correctly under cowl panel.
Replacing microfilter for interior ventilation
IMPORTANT: Risk of damage! A/C system must not be operated without the prescribed filter element.
Note on cleaning:
Spray microfilter housing from inside with BMW pollen filter housing cleaner* (observe instructions for use).
Comply WITH NOTES AND INSTRUCTIONS ON HANDLING CLEANING AGENTS ! Wipe away excess fluid.
This kills off germs, bacteria and fungi that cause smells.
The smell that results on the plastic parts of the microfilter housing is eliminated.
* Sourcing reference: BMW Parts Department
Remove sealing lips at marked points.
Unclip line and water hose (1) from cover (3).
Unlock retaining lug (2).
Feed out cover (3).
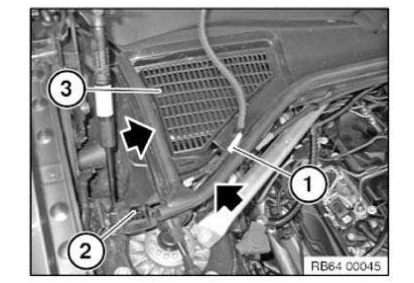
Cover tabs (1) must snap in correctly under cowl panel.
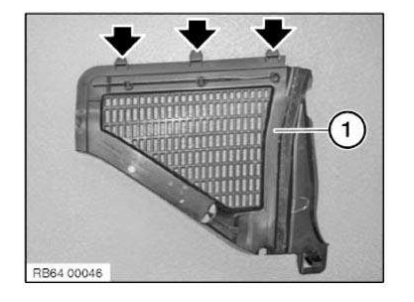
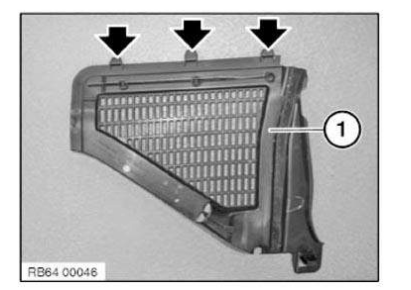
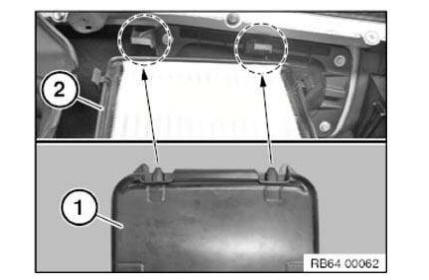
Remove filter cover (1) in direction of arrow.
IMPORTANT: Risk of damage!
NOTE: For purposes of clarity, illustration shows removed cowl panel.
Ensure that the latch mechanisms on the microfilter housing cover (1) are correctly seated under retaining lugs on the microfilter housing (2).
Retaining lugs on microfilter housing (2) must be neither bent nor damaged.
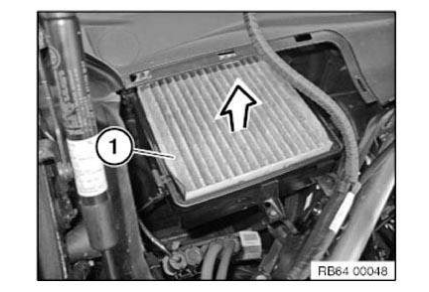
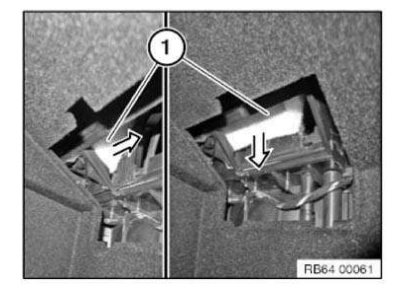
Remove upper microfilter (1) in direction of arrow.
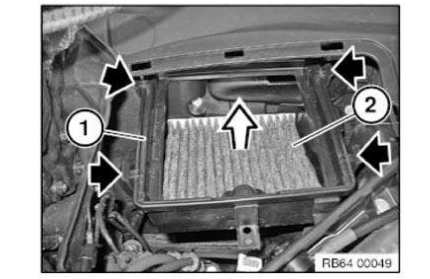
Unclip filter frame (1) at the marked points and detach.
Remove lower microfilter (2) in direction of arrow.
Installation note:
Two micro filters are installed in the vehicle. These are connected by a hinge.
Make sure upper microfilter and lower microfilter are installed in the correct position.
The arrows on the micro filters mark the direction of the air intake.
Replacing recirculated air microfilter
Special tools required:
- 00 9 322
Open glove compartment (2).
Unclip service bracket (1) at marked location and remove in direction of arrow.

Unclip flap (1) at the marked tabs and remove in direction of arrow.
Remove right microfilter (1) in direction of arrow.
If necessary, use special tool 00 9 322 as an aid.
First, pull the left microfilter (1) to the right and then remove toward the bottom.
If necessary, use special tool 00 9 322 as an aid.


Other materials:
BMW X3 (F25) Owners Manual > Notes: Vehicle features and options
This Owner's Manual describes all models and
all standard, country-specific and optional
equipment that is offered in the model series.
Therefore, in this Owner's Manual, we also describe
and illustrate features that are not available
in your vehicle, e.g., because of the selected
optional f ...
